If you’ve ever spent late nights troubleshooting why your off-grid solar system isn’t performing as it should, you already know the MPPT charge controller is the unsung hero of your setup. I’m Jake, part of the team at a leading MPPT charge controller supplier, and over the past 12 years, I’ve fielded thousands of calls from installers, small farm owners, and even hobbyists who assume their system’s problem is the solar panels, the battery bank, or even the inverter—when it’s almost always the controller. Mppt Charge Controller
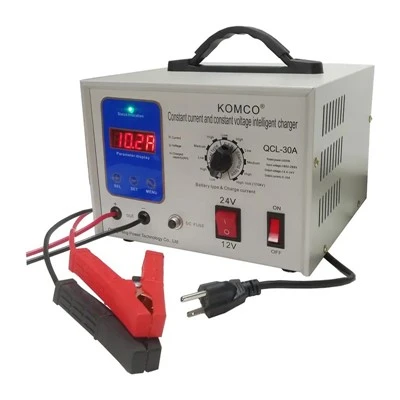
A lot of folks avoid replacing their MPPT controller because they think it’s a complicated, expensive job. And yeah, if you’re working on a 50kW commercial system, there’s a bit more to it than swapping a residential unit. But for most of us with small off-grid cabins, RV setups, or small commercial solar arrays, replacing an MPPT charge controller is manageable with the right steps, and it’s way cheaper than paying someone else to do it or replacing your entire system.
Before we jump into the how-to, let’s make sure we’re on the same page about what an MPPT controller actually does, because this matters when you’re picking a replacement. MPPT stands for Maximum Power Point Tracking, and unlike older PWM controllers (which waste up to 30% of your solar energy by matching voltage directly to the battery), MPPT controllers constantly adjust to pull the maximum power your panels can produce, no matter the light conditions. So if you’re still running a PWM controller from 5+ years ago, upgrading to an MPPT is a huge win—but even if you’re replacing an old MPPT, you can’t just grab any unit off the shelf. The number one mistake I see first-time buyers make is underbuying a controller that can’t handle their panel’s output.
Let’s walk through the process step by step, and I’ll throw in lessons I’ve learned from customers who messed this up over the years.
First, prep work. This isn’t something you want to do when the sun’s shining at noon and your entire cabin is about to lose power. Start by gathering your tools: a multimeter (critical—don’t skip this), wire cutters/strippers, a screwdriver set (Phillips and flathead, for most residential units), electrical tape or wire nuts, and a battery disconnect switch. Wait, the disconnect? That’s non-negotiable. The battery bank holds a huge amount of stored electricity, and even a small 12V battery bank can give you a nasty shock, or worse, arc and start a fire if you don’t disconnect it first.
Step one: Turn off all loads, disconnect the battery bank. Let me repeat that: Disconnect the battery. I can’t count how many times a customer called me panicking because their old controller sparked when they touched the wires, and it’s almost always because they skipped this step. Once the battery is disconnected, turn off the main breaker to your solar array too—you don’t want any voltage running through the panel wires while you’re working.
Step two: Document every single wire connection. This is another mistake that trips people up. Don’t just “remember” where the red and black wires go. Take photos with your phone, write down labels if your old controller has them, or even draw a quick sketch of which wire connects to the solar input, battery output, load terminals, and any communication ports (like for Bluetooth monitoring). I’ve had customers come to me with their old controller tossed, wires stripped, and no clue which is which—we spend 20 minutes on a call figuring it out, and that’s time they could’ve spent finishing the job.
Step three: Test the old controller to confirm it’s actually the problem. This is a big one. A lot of people assume their controller is bad because the system isn’t charging, but that could be a bad battery, a damaged panel, or a loose connection. Use your multimeter to test the solar input terminals: With the battery disconnected, set your multimeter to DC voltage, touch the probes to the solar input leads. You should see a voltage equal to your panels’ open-circuit voltage—if you see 0, there’s a problem with the panels, not the controller. Then test the battery terminals: If you connect a 12V battery, the voltage should match or be slightly higher than the battery’s voltage (around 13-14V for a fully charged 12V). If both check out, your controller is likely faulty. If not, you can narrow down the real issue before you buy a new controller.
Now, here’s where working with an MPPT supplier pays off. When you pick your replacement, you need to match the controller’s specs to your system, not the other way around. Let’s break down the specs that matter:
-
PV (solar) input voltage: Your panels’ open-circuit voltage (the voltage they produce when not connected to anything) has to be within the controller’s range. For example, if your panels are 48V open-circuit, you can’t use a 12V controller. Most residential MPPT controllers handle 12V, 24V, 48V, and even 96V systems, but make sure the controller’s max PV voltage is higher than your panels’ open-circuit voltage. If it’s lower, you’ll damage the controller. If it’s way higher, you’re wasting money—buying a 600V controller for a small 12V cabin system is overkill.
-
Charging current: This is how much power the controller can pull from your panels and send to the battery. To calculate the right current, take your total panel wattage, divide by the battery voltage. For example, 600W of panels on a 12V bank: 600 /12 = 50A. So you need a controller that can handle at least 50A. A lot of folks buy a smaller controller to save money, but that will cause the controller to overheat, shut down, and not charge your batteries properly.
-
Battery type compatibility: MPPT controllers work with lead-acid (flooded, sealed, gel, AGM), lithium-ion, and even custom battery types. If you have lithium batteries, make sure the controller has built-in lithium charging profiles—some older controllers only work with lead-acid, and you’ll end up damaging your lithium batteries if you use the wrong profile.
Once you’ve got the right replacement, it’s time to remove the old controller. Unscrew it from the mount (most are wall-mounted near the battery bank), gently pull the wires free from the terminals. If the wires are old, brittle, or frayed, now’s the time to replace them too—don’t just reuse old wiring that’s at the end of its life.
Now, installing the new controller. First, mount it in a cool, dry, well-ventilated spot. MPPT controllers get warm when they’re working, so don’t mount it inside a tight cabinet or near other heat-producing equipment. Leave a few inches of space around the unit for airflow—this will extend its life.
Next, connect the wires, following the photos/sketch you took earlier. Here’s the order that prevents sparks and damage: First connect the solar input wires, then connect the load terminals (if you have them), then finally connect the battery bank. Wait—no, hold on: If you’re connecting multiple wires, always connect the negative terminal first when working with the battery. That way, if your tool touches a metal surface, it won’t create a spark between the positive terminal and the frame. That’s a safety thing I learned early on—my first big mistake was a tool slip that sparked and melted a wire, and I still think about that to this day.
Once all the wires are connected, tighten the terminal screws snugly (don’t over-tighten, that can strip the terminals or damage the controller) and cover any exposed wire with electrical tape if needed. Then turn on the main breaker, and check the controller’s display. It should show the solar input voltage, the battery voltage, and the charging current within a minute or two. If it does great, turn on your loads and test that power is flowing like it should.
Wait, what if it’s not working right away? Don’t panic. The most common issue is reversed wires—if the display shows error codes like “OC” or “PV fault”, double-check that you didn’t mix up positive and negative on the solar or battery terminals. Or the voltage of the controller doesn’t match your system: A 24V controller on a 12V bank won’t work correctly, and vice versa. If you run into a problem, call your supplier—we don’t just sell controllers, we help people install them, and most of the time, a quick check of the wire connections fixes the issue.
Now, after installation, a few maintenance tips to make sure your new MPPT controller lasts as long as it should. Every 6 months, turn off the system, clean the controller with a dry cloth (don’t use water or cleaning sprays—they can damage the electronics), and check all the wire connections to make sure they’re still tight. If you live in a dusty area, wipe it down more often to prevent dust buildup from blocking airflow. Also, keep an eye on the display’s readings: If the charging current drops suddenly, check for loose wires, or a problem with your panels.
I’ve seen a lot of people hold off on replacing their MPPT controller because they think it’s a huge job, but the truth is, it’s one of the easiest upgrades you can do for your solar system. A good MPPT controller can add 20-30% more power to your setup, which means more energy for your appliances, longer battery life, and less stress on your entire system. If you’re not sure what size or type of controller you need, don’t guess—send us your system specs: total panel wattage, battery voltage, battery type, and we’ll help you pick the right one. No pushy sales tactics, no confusing jargon, just real advice from people who’ve worked with solar systems for decades.

Whether you’re replacing a faulty controller, upgrading from a PWM unit, or building a new system from scratch, we can help you find the perfect MPPT charge controller that fits your needs and your budget. Skip the hassle of guessing or making costly mistakes—reach out to us to discuss your requirements, and we’ll guide you through every step, from picking the right unit to troubleshooting after installation.
Votage Stabilizer References
- International Electrotechnical Commission. (2021). IEC 62109-1: Safety of power converters for use in photovoltaic power systems.
- Sandia National Laboratories. (2019). MPPT Charge Controller Performance Testing for Off-Grid Solar Systems.
- North American Board of Certified Energy Practitioners. (2020). Small Scale Solar Installation Best Practices Guide.
- US Department of Energy. (2022). Off-Grid Solar System Design and Maintenance Manual.
- Solar Energy Industries Association. (2021). MPPT Charge Controller Specification and Compatibility Standards.
Huizhou Qiangfeng Power Technology Co., Ltd.
As one of the most professional mppt charge controller manufacturers and suppliers in China, our products have good reputation in the market. We warmly welcome you to buy customized mppt charge controller made in China here from our factory. If you have any enquiry about quotation, please feel free to email us.
Address: No.28, Hu’ao Avenue, Shiwan Town, Boluo County, Huizhou City, Guangdong Province
E-mail: Komco@Jinlidianqi.cn
WebSite: https://www.qfautobatterychargers.com/
